Help
- Sign In
- Sign in issues
- Logout
- Change language
- Dashboard
- Simple and advanced search
- Agenda
- My account
- Messages
- Documentation
- Dynamic indexing
- Dedicated Jupyter Notebooks environment
- Contact us
Sign in
In order to sign in you must enter credentials used for account registration, in sign in page.
In "Email" field enter email address used to create your account.
In "Password" field enter password used to create your account.
If "Keep me logged in" is checked credentials will be stored in browser, so the next Spend.ro login will no longer be necessary to introduce credentials. However, if you are not the only person who use the computer, we suggest not to check the box in order to not allow other people to access your personal data.
After entering your credentials press "Login" button to access your account.
Sign in issues
If the displayed error is: "Email address is invalid", please check if you entered the correct email address. If it's correct please contact us at office@spend.ro
If you forgot your password, follow the link "Reset password" located in sign in page, under the button "Login". ou will be directed to reset password page, where you enter email address asociated with your account, then press "Reset Password " button. To finish reset password process, you will receive an email with instructions.
Logout
In order to logout all you have to do is press "Logout" button located in upper right of the website.

Change language
To change website language, in the corner right of the menu bar you will see two buttons, "Ro" and "En", which will be pressed depending on the language in which you want to display the website. Procedures details will be displayed in romanian regardless of the selected language.

Dashboard
Adding and managing widgets in dashboard
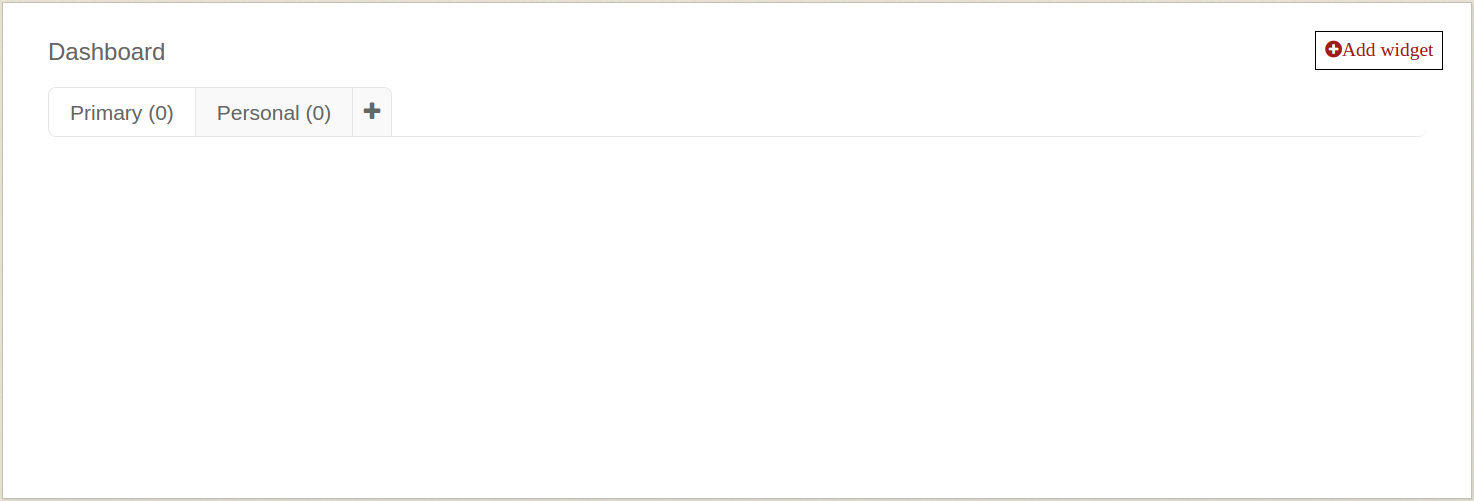
After authentication, the user is automatically redirected to dashboard.
This section allows managing widgets based on criteria of interest. You can customize dashboard by adding new widgets or removing existing ones and by ordering them according to your options. Also, in this section you can manage multiple panels.
In order to add a widget in primary panel press "Add widget" button located in the right side of the page under the "Logout", this action will open Widgets store, where you can find predefined application widgets. Widgets from the store can be added in the primary panel by pressing "Add" button. Changing display order of the widgets can be made using "drag&drop" method.
If you want to remove a wigdet from the panel, in the upper right side of every wigdet is the "Deactivate" button which, on pressing, will open the confirmation of widget deactivation window. To confirm press "Yes" button, or to cancel, "No" button. Only predefined application widgets who were deleted can be added back from the Widgets store anytime.
Create and manage a personal panel
Dashboard page contains two predefined panels, named "Primary" si "Personal". Widgets generated by user from a report are automatically added in "Personal" panel.
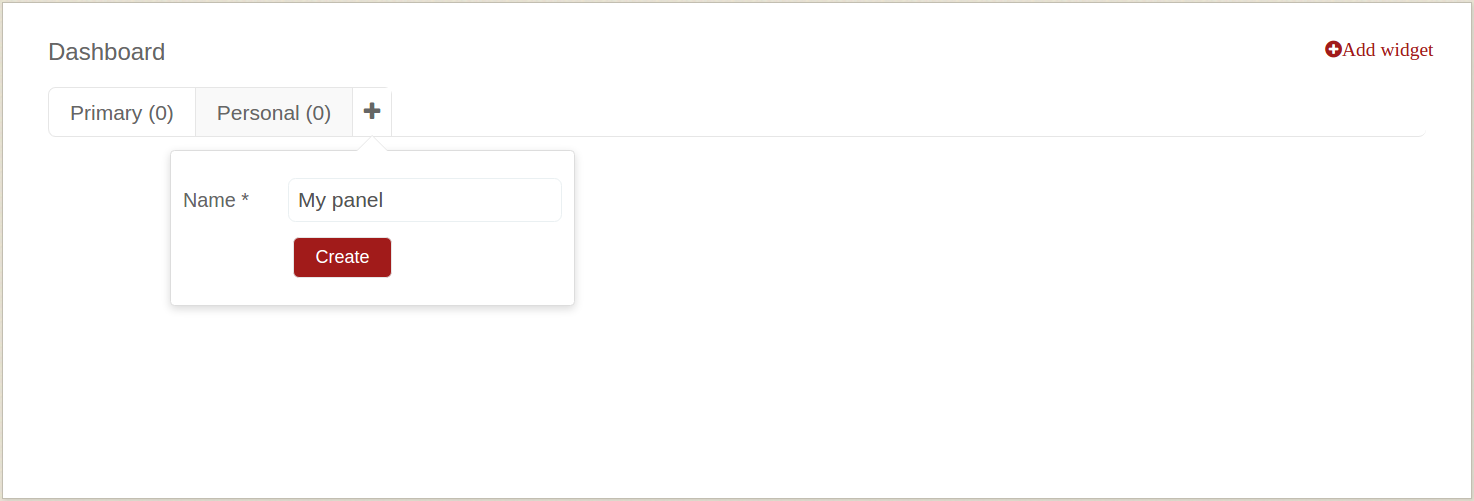
In order to create a new panel you will press "+" button, enter a name for it and press "Create" button.
To move a widget from a panel to another one created by user select the widget using the mouse and then pull it to the desired panel.
Delete a created panel
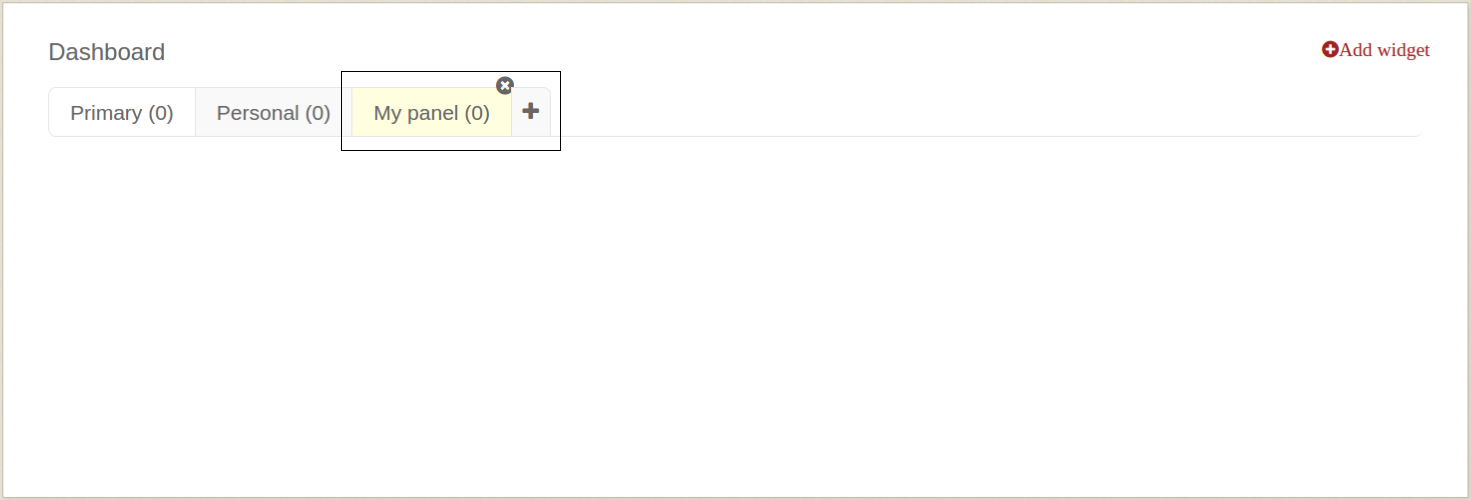
To perform this action mouse over the created panel and press "x" button, this will open the confirmation of panel delete window. Widgets from the panel will be automatically relocated either in "Primary" panel (predefined application widgets), either in "Personal" panel (user created widgets).
Neither one of the initial panels ("Primary" and "Personal"), can't be erased or renamed.
Simple and advanced search
Keyword search
To perform a simple search type key word/words into the search field and press Enter button or "" icon. Search by multiple keywords will return all results containing used words, regardless of the order of writing in the search field. In order to get an accurate search results enter your key words in brackets ("...").
Advanced search filters and their use
To display advanced search filters must click on one of the following buttons:
- "+" button located near search button (magnifier)
- "Reports" button, located on the menu bar, between "Dashboard" and "Agenda" buttons
- on the words "Reports" located at the bottom of the page, near "Contact".

In this section you can generate various reports based on your chosen filters (Procedure types, Values, Suppliers etc.). Clear selected/defined filters is achieved by pressing "Reset filters" button.
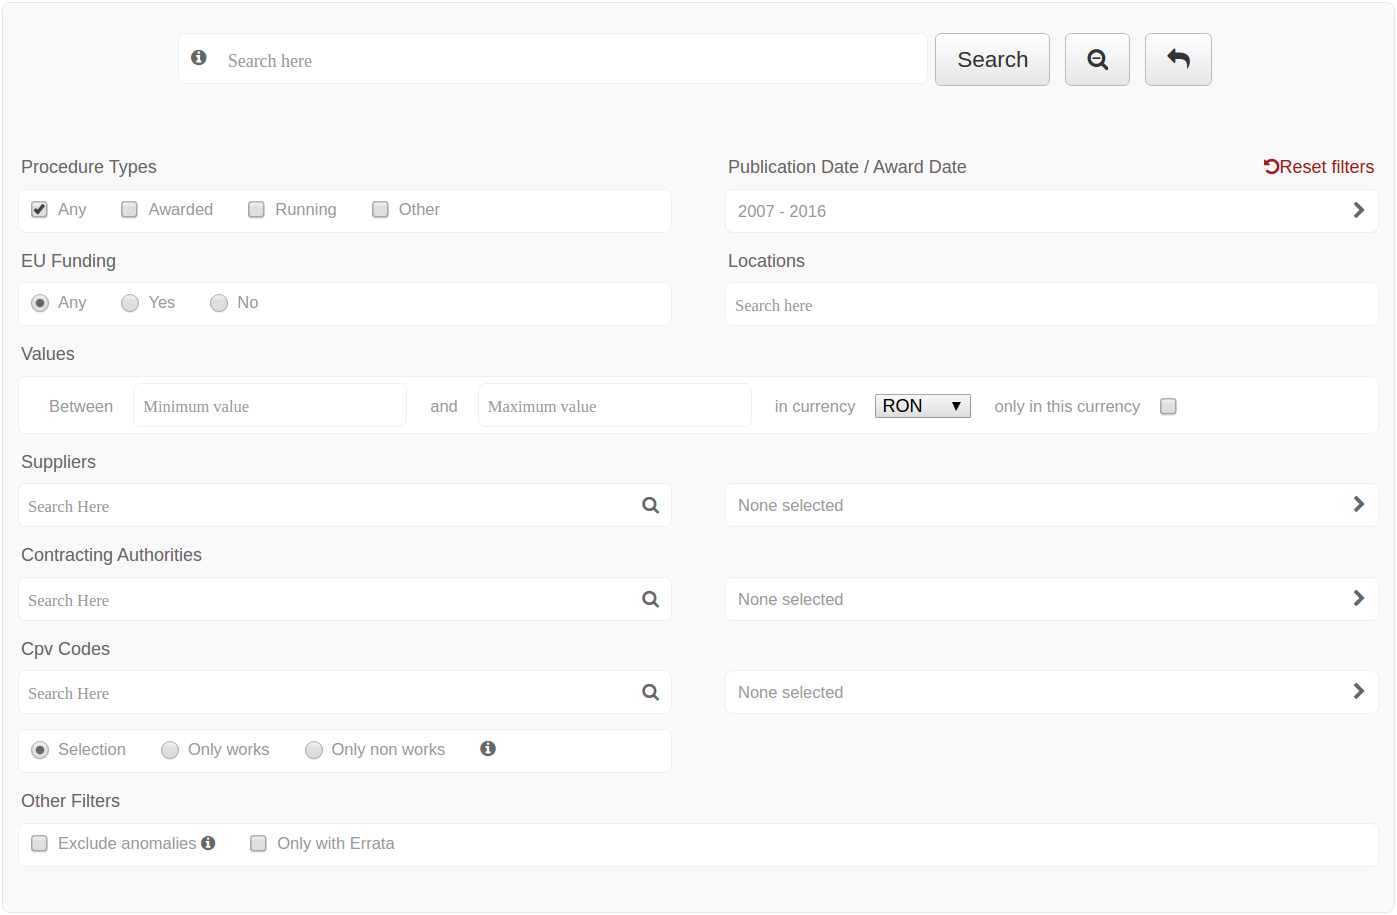
Suppliers, Contracting Authorities, CPV Codes filters allow search in the database of that information of interest to you by entering a sequence of minimum 3 characters of one or more words and clicking the magnifier button that belongs to the field. The action will open a list of results which can be taken full or partial as filter results used to create desired report. For multiple selection in "Results found"area, hold the "Ctrl button (or "Cmd" on MacOs) from keyboard and click on results of interest. Selected results will be marked with blue. To remove a result from a list of selections hold "Ctrl" button (or "Cmd" on MacOs) from the keyboard and click on the result that you do not want to be included in the Filterable results area. Moving the mouse over the buttons located between the Results found and Filterable results areas will display textual functionality of the button (Add all the records, Add selected records, Remove selected records, Remove all records). Selected records number can be viewed later in the search page (None selected/x selected).
To restrict or extend the results defined filters access fields which indicate the number of selections. The action will open the initial list of results where you can select other results and partially or entirely eliminate selected results.
After selecting the filter and/or complete filters, press "Search" button.
Also, from advanced search filters, can be loaded previous search, this being achieved by pressing "" button
"CPV Codes" filter offer multiple selection types:
- enter code/codes in the search field - filtering is performed based on the codes selected by the user
- select "Only works" - system will filter the CPV codes starting with “45”
- select "Only non work" - system will include all CPV codes except those from works category (the ones starting with ”45”)
"Exclude anomalies" filter - by selecting it will exclude procedures that meets the following conditions:
- direct acquisitions that exceed 30.000 EUR for supply & services and 100.000 EUR for works
- contract award notices or request for quotation procedures that don't have a contract attached
"Only with Errata" - by selecting it system will return only procedures with Errata.
"Procedure types" filter - has several selection options:
- "Any" - selected by default - will return all types of procedures
- "Awarded" - selecting it will return all awarded procedures
- "Running" - selecting it will return all in progress procedures
- "Other" - will return procedures with other state than awarded or running (cancelled, suspended, etc)
"EU Funding" filter - selection options:
- "Any" - selected by default - will return all procedures, regardless of funding source
- "Yes" - selecting it will return all procedures funded with EU funds
- "No" - by selecting it will exclude all procedures funded with EU funds
"Publication Date/Award Date" – will open a window from you can choose one of the following date filters:
- Current day
- Current month
- Current year
- Between years
- Between dates
Depending on the user selection system will return procedures with award date (not the date of notice publication) between selected dates.
"Locations" filter - by introducing a county name and selecting it from the displayed results, the system will return procedures from the selected county. The filter can remain blank or can be selected one or multiple counties.
Values" - it present following filter methods of the contract values returned by the system:
- "Minimum value" - will display procedures with a greater value or equal than the one inserted
- "Maximum value" - will display procedures with a value less or equal than the one inserted
- "In currency" - can be selected one of the following currencies RON, EUR, USD. Depending on the user's choice to select or not the "only in this currency", system will return contract value as follows:
- "only in this currency" - - not checked - procedure value will be displayed in the currency chosen by the user from "My Account", section "Preferences" Where is selected a currency other than the default/selected by the user, the icon ""appears next to each value, and by mouse over will display the value converted in selected currency from "Values" filter
- "only in this currency" - checked - will return only completed procedures in the chosen currency (can be entered or not a minimum and/or maximum value)
Saving results as a report or create a widget
In order to not perform the same search multiple times you can save it as a report or create a widget.
"Save search as a report" - press "Save report ( )" button, which is located in the right side, above first search result. Next step after pressing the button is to assign a name to the report (name must have a length greater than 3 characters), and then press "Save" button.
To view saved reports access "Saved Reports"section, located either in the search page, or in "My Account". Reports will be listed in descending order, chronologically, depending on the date they were saved.
"Save search as a widget" - press "Create widget ( )"button, located in the right side of the "Save Report" button, then give it a name, choose the type of widget (map, graph or list), the last step is pressing "Create" button. Created widget can be viewed in "Dashboard", in the "Personal" panel.
Export returned results
Shown results can be exported in various formats (xls, pdf, csv). In order to export them you have to press one of the following buttons Excel, CSV, PDF (positioned above the first search result), according with the desired format. Can export all returned results (maximum 10000 results) or only that page (depending on the user's choice, on a page it can be displayed 10, 25, 50 or 100 results).
Sorting results
It can be performed by:
- "Publication Date" (default results displaying - chronologically descending) - on first click results will be displayed chronologically ascending, on second click results will be displayed chronologically descending
- "Contracting Authority" and "Supplier" - on first click results will be displayed alphabetically ascending, and on the second, alphabetically descending
- "Contract Value" - on first click results will be displayed by value, descending; on the second by value, ascending
- "Location" - on first click will be grouped alphabetically ascending, on the second, alphabetically descending
- Procedure type sorting - depending on the search performed, system will return several types of procedures, if you want to view a specific type of procedure select it from procedures list positioned bellow sorting options described above
View report statistics
After displaying results you can view statistics of the generated report by pressing "Statistics"button, located between "Reports" și "Map".

Statistics will be displayed by procedure state (awarded, in progress, other), as follows:
- for procedures with "Awarded" and "In Progress" state will be displayed the following information:
- statistics grouped by procedure type - total number of procedures and their value
- annual statistics - number of procedures and their total value
- graphs for each year with procedures types and values
- graphs for each year with monthly distribution of the values
Will also be available statistics on the entities involved in procedures from the report, can be viewed both contracting authorities and suppliers by pressing "Entities List". By clicking "CPV Code List" button will be displayed CPV code statistics.
- for procedures with "Other" states will be displayed following information:
- statistics grouped by procedure type - total number of procedures and their value
- annual statistics - number of procedures and their total value
Subsequently generating the report can be accessed "Map", where you can view informations about the geographic distribution of contracts. Clicking on a county pin will display the total number of contracts, the total value of contracts in each currency it were assigned as well as their share from the total amount of the search contracts.
Agenda
"Agenda" button is located in the menu bar, between "Reports" and "My Account".

Clicking it redirects to "Agenda", where you can search, view and download the contact details of contracting authorities and those of suppliers present in public procurement market. Available filters for search:
- search field where you can enter desired entity name or registration code
- registration country
- registration county
- entity type (contracting authority or supplier)
Can be used one or many filters, results being displayed according to selected filter/s; if none is selected, all entities will be displayed. Following informations will be displayed:
- entity name
- registration code
- phone number
- country
- county
- entity type
- "Download vCard" button (which, by pressing will download contact details of that entity - it will be saved as vcf in your computer/device, in the location specified in your browser, according to your options).
Please note that there is a possibility that certain entities may have incomplete information details.
My Account
Access button is located on the menu bar, between "Messages" și "Help".

Edit preferences
Accessing "My Account" will be redirect to "Preferences"page, consisting in:
- show system labels (for example EU-Funded label) - in order to display system labels you must also check the "Show labels" checkbox.
- show labels (those created by you) - only if this is checked, system labels will not be displayed.
- display as table the report - if you check this box, search results will be displayed as a table, otherwise, as a list.
- display language - from a dropdown you can choose romanian or english
- default currency - from a dropdown you can choose the currency in which public procurement contracts values will be displayed (we mention that the awarded currency will be displayed, and the one chosen by user can be viewed by placing the mouse over the "" sign, located in the right side of the value)
In order for the modifications to take place press the Save button.
Edit profile
It is the first button from the left side of "My Account" menu.
Can be edited:
- First name
- Last name
- Password (if you want to change the password, it must have at least 4 characters and must be repeated in "Confirm password" field)
In order for the modifications to take place press the "Save" button.
Add and manage subusers associated to the account
Access button ("Users") is located in "My Account" menu, between "Preferences" and "Billing" buttons.
To add a subuser associated to the account you have to fill all fileds of the "Add a child user" form, and then click on "Save" button. Once saved, it will be displayed in users table, with the following available actions:
- login - by clicking it you can login as subuser
- edit - you will be redirected, by clicking, to edit user page, where, once changes were made you will click on "Update user" button, and then, by pressing "Back" button, you will return in "Users" page
- deactivate - by clicking it will open a confirmation window of user deactivation, where you can either cancel or accept
- activate - by clicking it will open a confirmation window of user activation, where it can be accepted or canceled
View and manage saved reports
To view and manage saved reports, click on "Saved reports", located between "Billing" and "Exports", from "My Account" menu.
In order to open a report click on it's name.
Reports will also display the generation date and a delete button.
View and download exported reports
"Exports" (located on "My Account" menu, between "Saved Reports" and "Messages") - opens, by clicking, exported reports page. Each table row contain:
- report name (it is the name given by the system when it is generated and cannot be customized until it will be downloaded)
- file type (xls, csv, pdf)
- archive (yes or no)
- date of generation
- file size
- options - with two possibilities:
- "download" - will download the report
- "delete" - will open a confirmation window where you either accept the delete or cancel it
Messages
Viewing or sending a message can be done by accessing "Messages" page from:
- main menu, clicking on "Messages" (located between "Agenda" and "My Account")
- "My Account", clicking on "Messages" (last from right) from menu
To view a message, all you have to do is to click it, in Messages list from the left side of the page. Also, from Messages list you can hide a conversation (you cannot delete conversations) pressing on "x" button, located on the upper right side of the conversation.
In order to send a new message click "New" button, then enter the recipient, message, and then click "Send Message" button.
Documentation
To download documentations or CNSC decisions, you must click on "Documentation" button, located under the menu bar.

Enter the search terms, check one or both checkboxes, and then press "Search" button.
Awarding documentation - by entering the search terms, system will return all documentations that contain those terms. To view information you ca download documentation in pdf, doc or txt format (depending on the format in which they are available).
CNSC decisions - after entering search terms and clicking on "Search", system will return those decisions which contain search terms, and to view the details of a decision download it by clicking on download link.
Dynamic indexing

Makes it possible to create custom labels, so, near those procedures which, for example, contain a certain CPV code (considered of interest, for which was created a label), will display the label for a quicker view of procedures that may be of interest.
Can be created custom labels for:
- Suppliers
- Contracting authorities
- CPV Codes
- County
- Value
- Currency
- Custom
- All Labels - in this section you can see all custom labels and their containing details
In order to create a label you must follow the next steps:
- enter searching terms (into the related section)
- click on "Search" button
- after display, it can be used in order to create the label with all results by click on "" button (add all records), or certain results by multiple selection using "Ctrl" (or "Cmd" on MacOs) button and click on results of interest. Selected results will be marked with blue, and in order to use them as filterable elements in order to create a label they will be moved in "Filterable results" area clicking on "" (add selected records) button. To remove all results you will click on "" (remove all results) and to remove only certain elements, after selecting them (same way as above) click on "" (remove selected records)
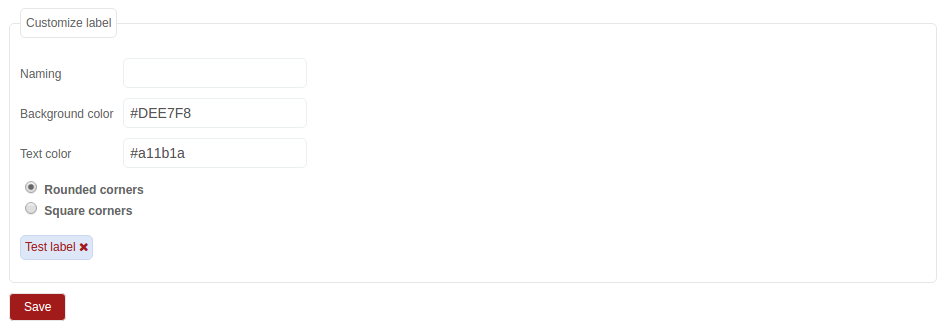
- customize the label - will assign a name and also can be customize text and background color.
- clicking on "Save" button to complete the creation of the label
- to delete a label click on "x" button, located in his right side and then confirm removal
- if you uncheck the label Checkbox it will no be displayed with procedures that contain selected details within the label
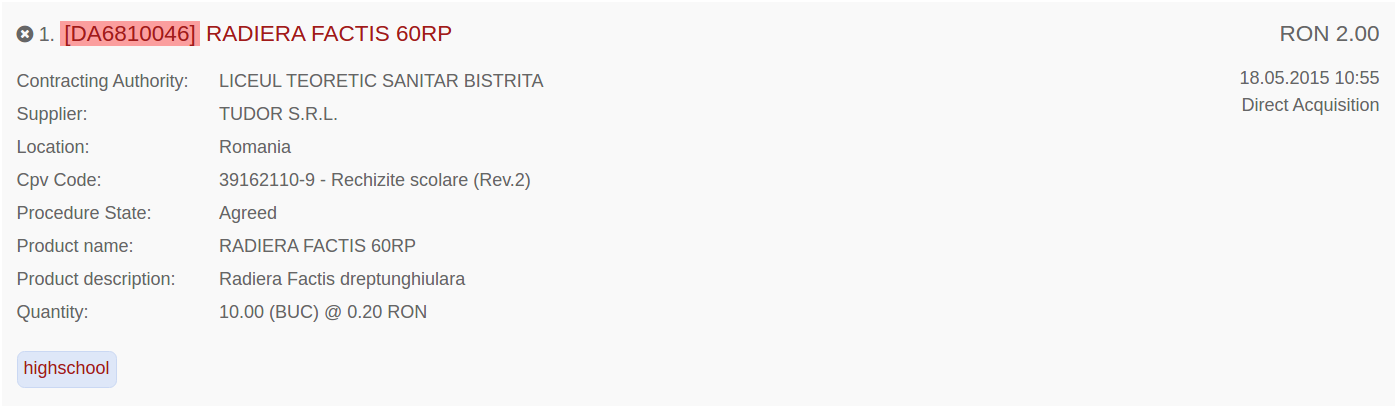
Display example of a procedure with custom label
Dedicated Jupyter Notebooks environment
Contact us
To contact us click on "Contact" located on the menu bar, in the right of "Help" button.